Sax Repairs: Selmer MKVI Overhaul
1st March 2022The Dawkes Music workshop team are fortunate enough to see several inspiring professional musicians for running repairs and servicing. One such player who we know, and love is Simon Bates. Simon is a Yamaha endorsed artist with an impressive list of film and TV, pop, jazz and live playing experience to his name.
This is the story of his beloved old Selmer MKVI Alto Sax and how we gave it a new lease of life…
New York – The Back Story
Long before his Yamaha endorsement, a 16-year-old Mr. Bates bought a Selmer MKVI Alto Saxophone (with no previous owners) from a music shop in New York. Simon recalls having to practically audition for the opportunity to buy it. The shop owner knew what he had and was selective about who he sold to.
Passing this ‘test’ felt like a benchmark in Simons personal playing history. Hence this Alto Sax is still very close to his heart, despite the various high end modern horns he’s played since.
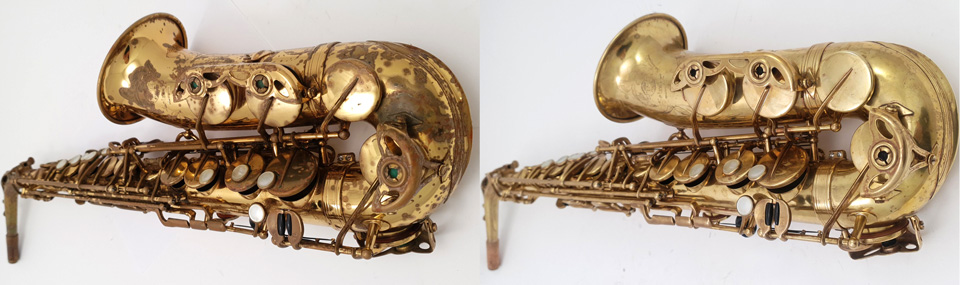
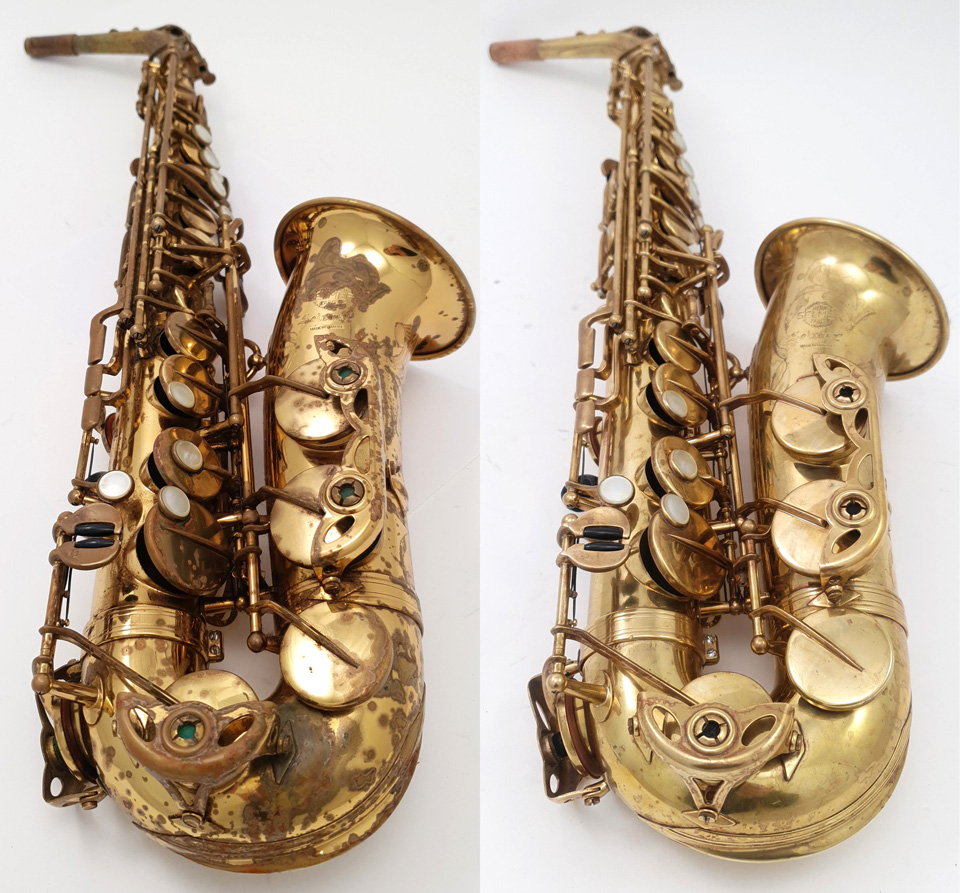
He wanted us to wake it from its slumber; to transform it from a hammered old horn with broken pads (as seen above) to the free-blowing instrument he remembers so fondly. It’s always enjoyable to work on such a well-made instrument, but it’s an honour to work on something sentimental with such a great backstory. We got to thinking about what we could do for it.
A Selmer MKVI – In Need of TLC
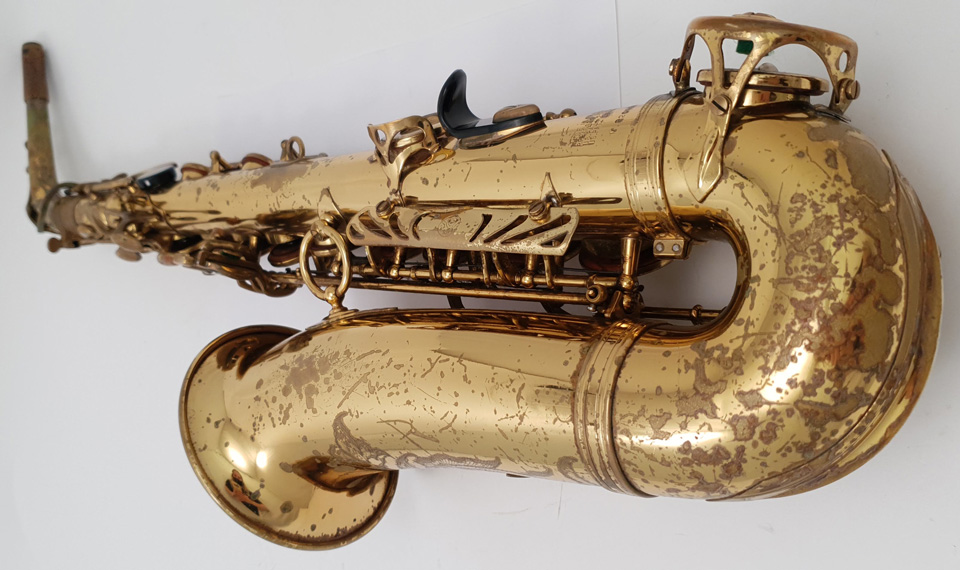
There wasn’t much lacquer left on the instrument; wear and tear over the years had left the cosmetics patchy and rough. Some people love this look, but Simon and I agreed it deserved a spruce up. Re-lacquering on Saxophones can be invasive, so we opted to remove what remained of the tired lacquer first. Then, polish the body and keys to blend and even out the overall effect.
This option of stripping lacquer is very popular at the moment and is now something we are able to facilitate in-house. Just contact us in the workshop for more information.
Stripping Lacquer
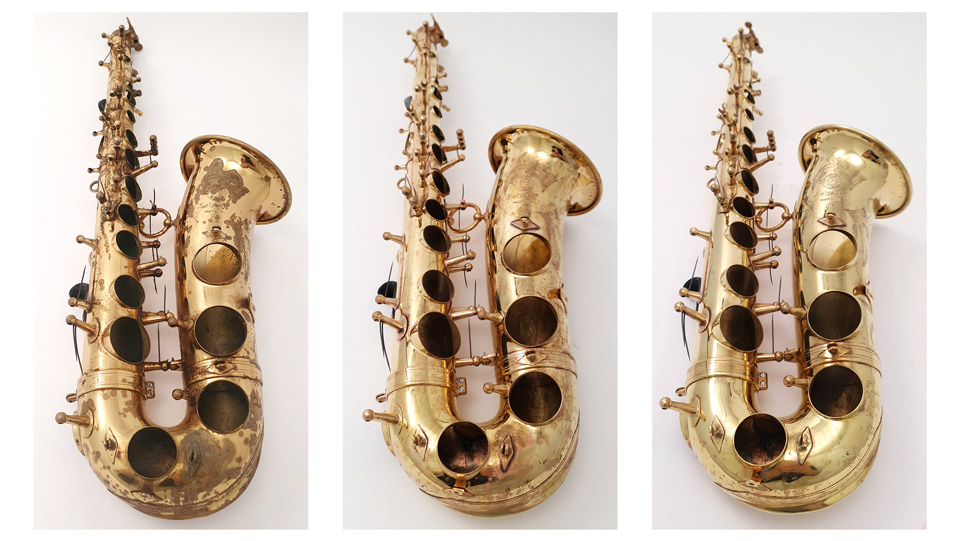
Step one is a chemical stripper – this acidic liquid only takes minutes to remove lacquer like sunburn. All parts are then submerged in a passivating alkaline solution to halt the acids effects and protect the brass. At this point the instrument was completely raw brass, but milky and dull.
Next step is polishing, which is where the brass comes to life, in places achieving a mirror shine you can see your face in. I used a combination of fine emery and buffing mops with various compounds to even out the tone of the base metal without removing all its personality. In the image below you can see it from the raw state (left), through to the stripped (centre) and finally the polished body (right).
Preparing the Body
Next step is key fitting and body prep – an important stage in any Sax overhaul. Even more so on a vintage horn that’s seen as much playing time as this one had. Any small dents or bent pillars must be dealt with first, aligning all pillars nicely with their rods so that nothing is under unnecessary tension.
I then swedged any worn keywork, which involves physically stretching the material of the hinge tubing to eliminate any lateral play between pillars.
Whenever the body or keywork finish is altered, swedging is likely to be necessary. Even a fraction of a millimetre at either end of the key can create a tiny gap in the mechanisms. Once the keywork was all fitted, I flattened all the tone holes in preparation for pad installation. I’ve written a separate blog about tone hole levelling, if you’re interested to learn more about that process.
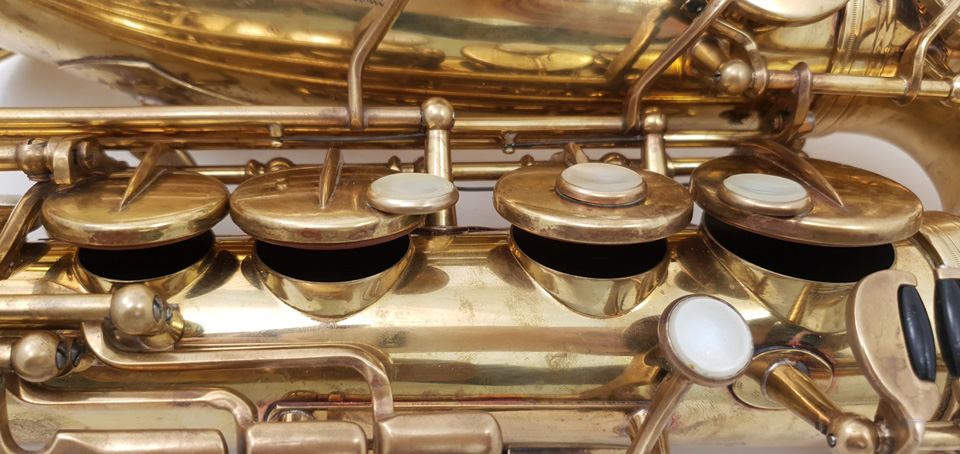
Padding
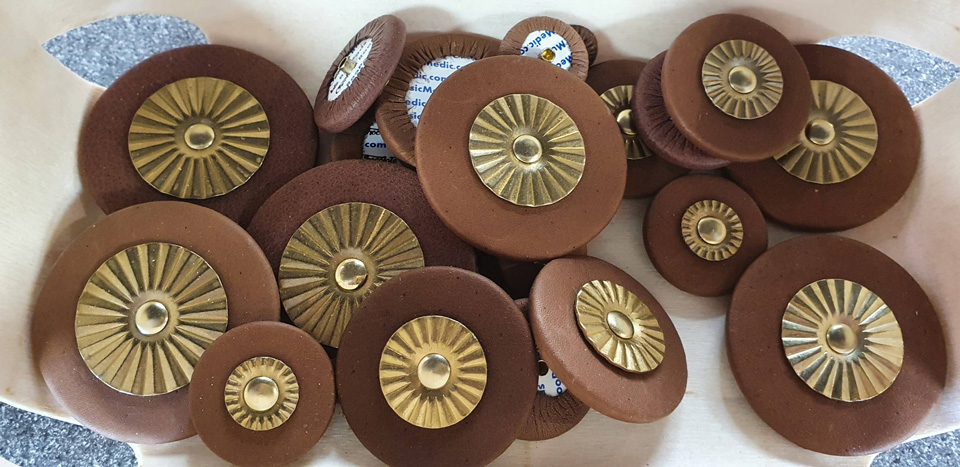
Putting this much time into the preparation of the re-pad makes for an extremely satisfying overhaul. When the mechanics are solid and the end result is coming into focus, it’s a pleasure to sit down and exercise the craft of instrument repair. I overhauled Simons Tenor Sax a couple of years ago and opted for Music Medic ‘Roo-Pads’ which he’s been enjoying the benefits of, so we went for a similar choice for this horn.
Chocolate kangaroo leather pads with Classic Maestro raw brass resonators felt like a great choice for maintaining the original character of the instrument. We didn’t want to increase the tonal brightness too much, and the raw brass resonators complimented the newly polished brass body and keys. I used Music Medics synthetic clear shellac to install the pads, which I’ve been raving about for the last couple of years.
High Performance Tweaks
I like to use modern synthetic materials to cushion and quieten keywork noise as much as possible. A combination of firm, rubberised tech-cork and ultra-suede gives a really positive action with no sponginess. The black ultra suede absorbs impacts beautifully, reducing percussive mechanisms and bounce.
Applying thick ulti-max oil to pivots and hinge points ensures a smooth, free action with long-lasting lubrication. The final touch is a new crook cork and a play test, where any finishing tweaks to the regulation can be made.
Final Thoughts & Bedding In
We’ve made a couple of tweaks since collecting the horn, I increased spring tensions and adjusted some venting for Simon. These are the kind of adjustments that an experienced musician will often request. When you know how you like an instrument to feel in response and feedback, we are more than happy to adjust accordingly.
If any of our readers would like to learn more about upgrade materials, overhaul options or re-finishing we’re always happy to advise, don’t hesitate to get in touch. Finally, thank you Simon for entrusting me with this fulfilling and gratifying overhaul.
If you’d like to hear it in action, please check out the video below which features Simon playing the overhauled MKVI Alto at one of our Dawkes Live gigs.
Abi – Workshop Manager