The Summer of Vintage Saxes!
15th September 2015This summer we have seen a multitude of beautiful vintage saxophones come into the workshop so we thought you might like to see what we have seen and what their issues were. Have a look through, there are some real beauties!
Click on the images to see a larger version in our Facebook Photo Album.
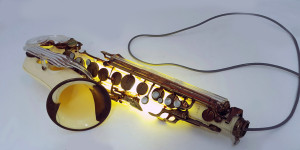
The highly unusual Grafton was developed by Hector Sommaruga. The instrument takes its name from the street (Grafton Way) where his shop was based in the 1940’s. The decision to manufacture a saxophone from plastic was based on the cheapness of the material rather than any tonal reason. The mechanism incorporated a unique springing system, many of the posts for attaching the mechanism were cast as part of the body, making them a nightmare for repairers! Although, there is something remarkably beautiful about the way the leak light glows inside. Graftons were on sale to the public in 1950, costing £55 – about half the cost of a standard sax at the time!
#2 – The Selmer Mark VI
The saxophone that needs no introduction! There are a large number of these horns still around, in varying levels of wear. This one was particularly tired, and had come back from the Arab Emirates where the heat and humidity had blitzed the lacquer, leaving it looking rather lovely. A full overhaul made it play like new!
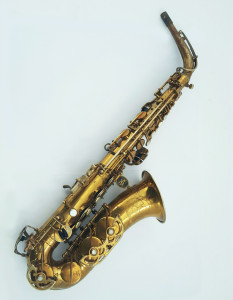
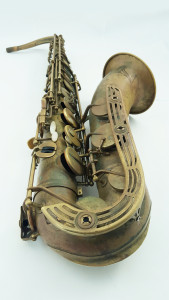
#3 – The Selmer Balanced Action
The Balanced Action completely revolutionised the design of saxophones, placing the bell keys on the right side of the bell for the first time. This allowed the little finger to operate the bell and G# ‘table keys’ in a natural closing motion rather than rolling. As a result, less effort is required to operate the low B and Bb, and the key action is more direct and balanced – hence the name! This one had original lacquer that had darkened beautifully!
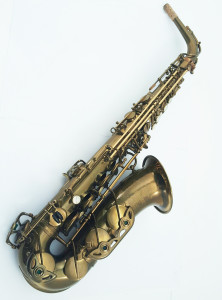
#4 – The Buffet Superdynation
This is Buffet’s most famous saxophone, and is one of the only serious competitors to the Selmer Mark VI in the category of ‘best all-around vintage horn’, even though it is much less known. This beautiful alto has “sparkle” lacquer – if you catch it in the right light the lacquer has a crackled effect and sparkles beautifully. This one had also been repadded with white Roo pads, which really made the golden colour pop.
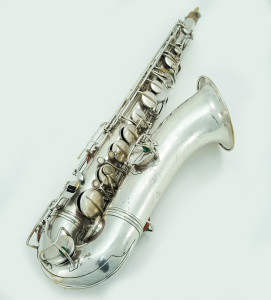
#5 – The Selmer Cigar Cutter
The ‘CIGAR CUTTER’ name was coined because the flat plate in the octave mechanism had a diamond shaped hole in the middle of it, making it look like a cigar cutter which were very common at the time. This one had a mixture of satin and gloss silver plate, and was in immaculate condition.
#6 – The Yamaha 61
The 61 series was important in the development history of the saxophone, and is just about approaching a vintage status. When they first appeared on the market it was at a time when there was almost no choice other than to buy a Selmer or look for something much older. The key guards are as striking today as they were when it was first developed in the 1970s. This one belongs to one of our shop staff, and what a noise it makes!
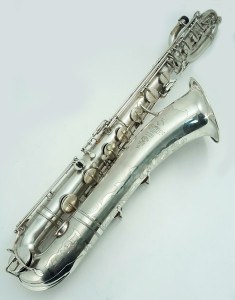
#7 – The Conn New Wonder
Conns simply sum up the Big Band sound: you can put a lot of air through them and blow the roof off. These horns were generally more technically advanced than others of the same era and were produced in large quantities. This one, with bell keys placed on either side, was responsive and bright.
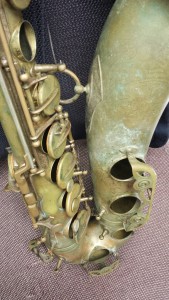
Repair Problems Most Common in Vintage Horns
Tone holes can be a big problem when repairing vintage saxes.
Whether it is just due to the age and means of manufacture at the time, or if the horn has had a hard life, it can cause a big issue when it comes to pad seating. It is frustrating and time consuming to try and seat a perfectly flat, modern pad over a warped surface.
A good way to resolve this is to re-surface the tone hole. This should only be done when absolutely necessary, as the material taken away during this process cannot be put back. It is important to know when to stop, and to be fully aware of all surrounding parts to be sure not to mark anything. Look for any dents near to tone holes, and try to assess the profile of the tone hole rims where possible. We use a medium tone hole file and a mini tone hole file